
How to Track a Deer After You Shoot It: Complete Guide
The moment after the shot is one of the most critical phases of any hunt. Your decisions in the first few minutes — waiting, initial tracking, and sign reading — directly determine whether you recover your deer or lose it in the woods. A wounded deer that flees is harder to track than a still one, and the first steps you take can mean the difference between finding your animal and going home empty-handed.
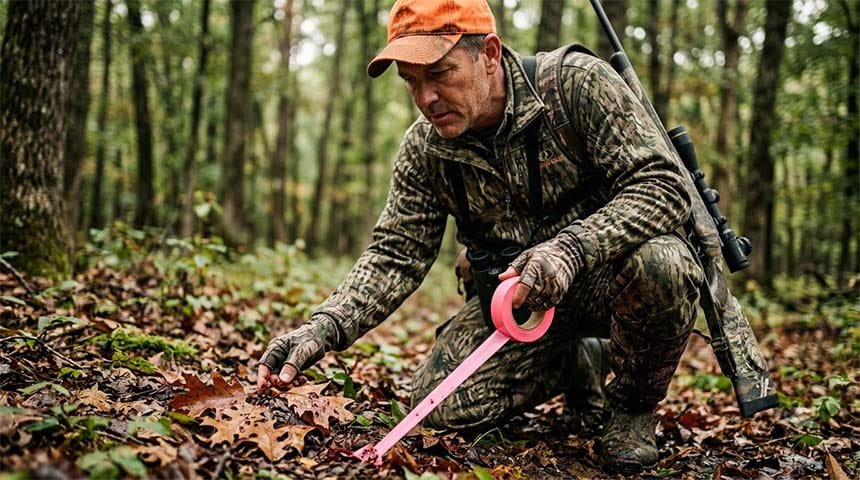
This guide walks you through every phase of deer tracking — from the critical wait period after your shot, to reading blood signs and identifying trail markers, to recovery techniques that maximize your chances of finding a wounded deer quickly. Whether you’re a bowhunter waiting to hear a crash or a rifle hunter tracking through dense cover, understanding shot placement, blood trailing, and search patterns will transform you from a frustrated hunter into a confident tracker. Pair this guide with knowledge of when the best time to hunt deer is, and you’ll optimize every aspect of your hunting strategy.
📍 Deer Tracking Quick Reference: Key Phases
Follow these phases in order for the best chance at recovery.
The Critical Wait (First 15-30 Minutes)
After a shot, resist the urge to immediately follow. Wait quietly to allow a hit deer to settle, then listen for the crash. This period defines your entire tracking success — a rushed pursuit can spook a nearby deer into running farther.
Initial Inspection & Sign Assessment
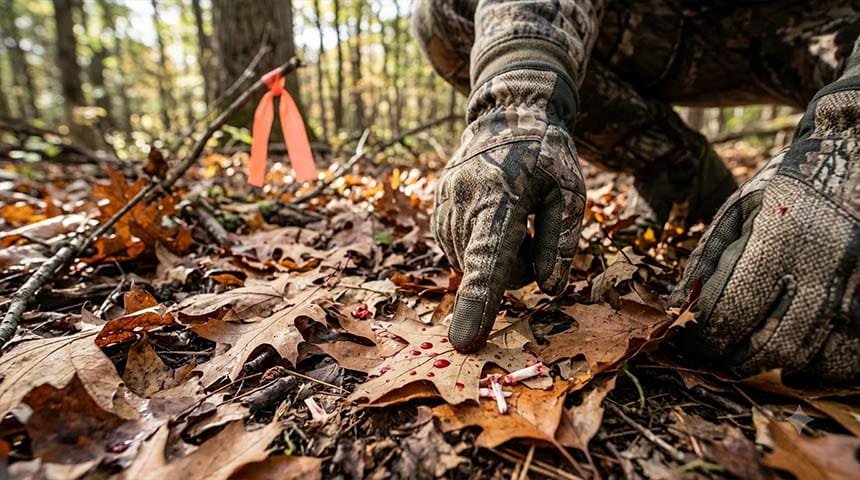
Carefully examine the immediate area where the deer was standing. Look for blood, hair, bone fragments, and intestinal matter. These signs reveal shot location and severity, guiding your tracking approach and recovery expectations.
Slow, Methodical Tracking
Follow blood and sign at a walk, not a run. Mark your trail with flagging tape, never lose sight of sign, and resist pushing too fast. A lost deer is worse than a slow recovery — patience beats speed.
Identifying Shot Location & Severity
Blood color, consistency, and location reveal where the deer was hit. Bright arterial blood suggests quick death; dark, watery blood suggests paunch; hair type reveals entry angle. These clues inform how far to track and what to expect.
Recovery & Processing
Once you locate the deer, confirm death, ensure safety, and begin the recovery process. Know your local regulations, prepare for field dressing, and plan transport before the hunt even begins.
🎯 Step-by-Step Deer Tracking Guide
Patience After the Shot Is Your Biggest Asset
The moment after your shot is the hardest time to stay calm. Your adrenaline is spiking, and you want to immediately jump down and track. Don’t. A hit deer that’s not immediately incapacitated will run if startled again. By waiting, you allow the deer to bed down or die in peace, dramatically improving your recovery odds.
✔ Wait Times by Confidence Level
- Confident heart/lung shot: 30 minutes minimum. This deer often runs 50-100 yards and dies within 30 seconds.
- Less certain hit: 45-60 minutes. Uncertainty requires patience. A rushed push can turn a recoverable deer into a lost animal.
- Possible paunch/liver hit: Wait 2+ hours. This deer needs time to bleed out internally, and rushing guarantees a lost animal.
- Bowhunting: Always wait minimum 30 minutes, even on confident shots. Broadheads can deflect or fail to pass through completely.
What to do while waiting: Stay in your stand or hide. Do not climb down. Listen for the crash — a distant sound of impact and thrashing usually means a solid hit. If you hear nothing, don’t panic; silent deaths are common with good shots. Smoke, hydrate, calm yourself. Use this time to gather your gear and mentally prepare for the track. Proper pre-hunt preparation through scouting like a pro helps you understand the terrain you’ll be tracking through.
Read Every Clue at Your Firing Position
Once you’ve waited and climbed down, carefully examine the area where the deer was standing. Don’t charge into the brush looking for blood yet — start here. This spot tells the entire story of your shot.
🔍 What to Look For at the Shot Site
- Bright red blood: Arterial blood. Heart/lung hit likely. Expect quick death, usually within 100-150 yards.
- Dark, foamy blood: Lung damage with blood frothing. Good hit; usually dies within 150-300 yards.
- Dark, watery blood: Paunch or liver hit. Deer needs more time to bleed out. Track slowly, expect longer distance (300+ yards).
- Hair only, no blood: Possible miss or poor hit. Inspect carefully for blood deeper into woods before committing to a long track.
- Yellowish material (bile/stomach contents): Definite paunch hit. Expect a long track; use extreme caution.
- Bone fragments: Indicates skeletal hit. Severity depends on which bones; shoulder hits can be instantly fatal.
- White/yellowish hair: Belly hit (usually poor). Brown/gray hair suggests body cavity entry.
Use a marker: Place a surveyor’s flag or piece of clothing at your firing position. This prevents you from losing your starting point while tracking and helps you orient your search area.
Never Lose Sight of Where You’ve Been
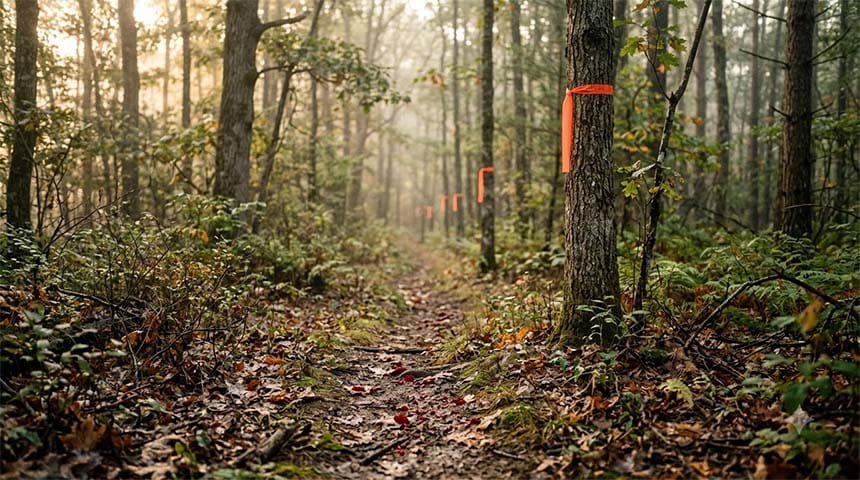
As you begin following blood or sign, use surveyor’s flagging tape (or biodegradable ribbon) to mark your path every 20-30 feet. This serves multiple purposes: it prevents you from walking in circles, helps you retreat if the track goes cold, and allows others to assist without losing progress.
✔ Flagging Best Practices
- Use bright, visible tape (orange, yellow, or white) that’s easy to spot from a distance.
- Mark high (eye level) so tape is visible above brush or tall grass.
- Place tape on both sides of your trail to guide you forward and mark your return path.
- Never wander without flagging — a lost track wasted hours of hunting time.
- Retrieve flags after recovery or when you abandon the track; leave no trace hunting.
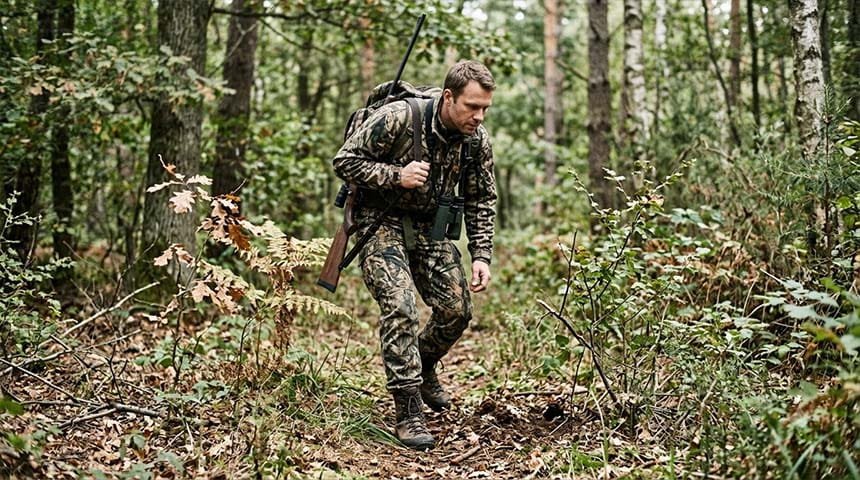
Pace yourself: Walk slowly, eyes down. Move at a walk, never a jog. Look for the next blood spot before stepping forward. If blood becomes sparse, slow even more — you’re about to lose the track.
Blood Tells You Everything About the Wound
As you track, observe blood pattern, volume, and consistency. These signs predict how far the deer will travel and how quickly it will die. Proper setup with strategic deer decoys and proven deer attractants increases encounter odds, making accurate shots more likely.
🔴 Blood Sign Interpretation Guide
Heavy, bright red blood:
Heart/upper lung shot. The deer is hemorrhaging severely. Follow confidently — you’ll likely find it within 100-200 yards. High recovery rate.
Moderate, dark red blood:
Lower lung or high liver. Still a quality hit. Track steadily — expect 150-400 yards. Good recovery odds.
Sparse blood with long gaps:
Paunch, low liver, or marginal hit. These deer travel far (400-600+ yards) before dying. Stay committed; don’t give up if blood sign thins out temporarily.
Heavy, watery, dark blood:
Paunch definite. Prepare for 600+ yard track. This deer will live for hours. Track slower, let it bleed out. Pushing it will only extend the chase.
Blood sprayed on vegetation:
Arterial spray means a major blood vessel is severed. The deer won’t travel far — likely under 100 yards.
Tracking terrain patterns: Wounded deer typically follow paths of least resistance. They prefer open areas over thick brush (unless spooked), often move downhill, and seek water. Don’t expect a straight line — anticipate curves and direction changes. Late-season tracking in extreme cold is eased with quality blind heaters during the initial sit, keeping you alert and sharp for the critical wait period.
When the Trail Thins Out, Don’t Panic — Search Methodically
Every tracker eventually reaches a point where blood becomes sparse or disappears. This is normal and doesn’t mean the track is lost. Use secondary sign to continue.
✔ Secondary Sign to Follow
- Disturbed leaves/soil: Hooves churn up the forest floor. Follow the disturbance line.
- Broken branches: A wounded deer crashes through vegetation rather than stepping over it. Look for chest-height snaps.
- Hair on branches: The deer’s body catches hair. Collect strands and continue in the direction they point.
- Prints in soft ground: Muddy or sandy areas show clear tracks. Check for blood in hoofprints.
- Bedding sites: Wounded deer often bed down within 100-200 yards of where sign goes cold. Search in likely bedding cover (dense brush, tall grass).
- Droppings: If the gut is hit, look for scattered scat along the trail — a sign of internal bleeding.
Search pattern: If blood truly vanishes, move ahead in the direction of travel using secondary sign. Make widening circles (20-30 yards per circle) around your last blood spot. Slowly expand your search until you reacquire sign or find the animal.
Find Where the Deer Died — Approach Carefully
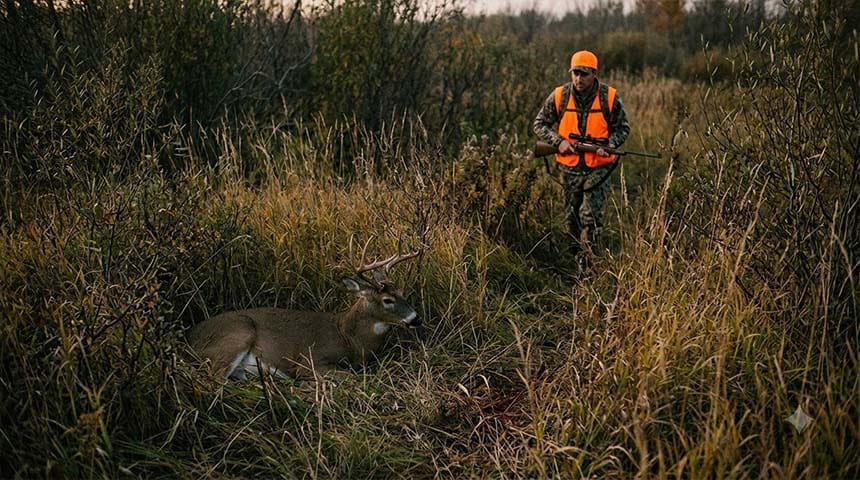
Once you spot the deer or find it bedded nearby, approach slowly and cautiously. A wounded, adrenaline-fueled deer can still react violently. Always assume the deer is alive until confirmed dead.
❌ Safety Critical: Never Assume Death
- Approach from the side or rear, never head-on where the deer can see and react.
- Watch for rib movement — a sign of breathing. If ribs move, the deer is alive.
- Look at the eye. A dead deer’s eye is clouded or unresponsive. A living deer’s eye will track your movement.
- Tap the eye with a stick — if there’s no reaction, the deer is dead.
- Never reach for horns or antlers on a live deer. Use your firearm or knife to ensure death.
- If the deer is still alive, use a follow-up shot to the vitals (heart/lungs) to quickly finish it humanely.
After confirmation: Once the deer is confirmed dead, take a moment to respect the animal. Your shot and tracking effort led to this moment — honor the harvest by committing to proper field dressing and recovery.
Prepare for Processing Before the Hunt
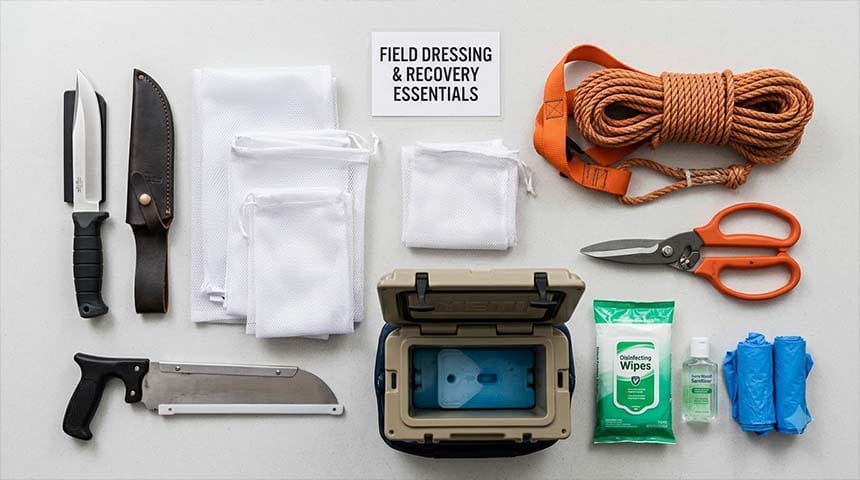
Before you ever head into the field, know your local regulations regarding field dressing location and timing. Understand the anatomy of the field dress, have the right tools, and know how to preserve meat quality during recovery.
✔ Pre-Hunt Preparation
- Know your state’s regulations on field dressing location (some require chest cavity opening, others allow dragging)
- Pack a sharp knife, bone saw, game bags (or coolers), and rope for dragging
- Understand basic field dressing anatomy — remove organs quickly to cool the carcass
- Have a meat cooler or access to one within reasonable distance (preference: under 6 hours from harvest)
- Plan your recovery route before needing it — how will you get the deer out? Do you need help?
Include in your deer hunting gear checklist: sharp knives, bone saw, game bags, coolers, rope, and a partner for recovery if possible. Field dressing alone with a heavy deer is significantly harder than with help. Proper pre-hunt setup using ethical deer attractant strategies increases your chances of a successful hunt from the start.
🔴 Quick Reference: Blood Sign & Likely Outcomes
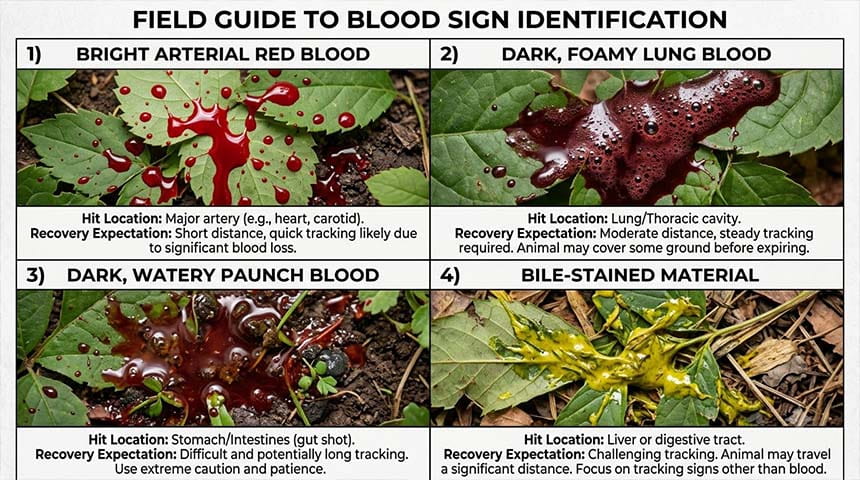
| Blood Appearance | Likely Hit Location | Expected Distance | Recovery Outlook | Tracking Strategy |
|---|---|---|---|---|
| Bright red, heavy | Heart/Upper Lung | 50-150 yards | Excellent | Track confidently, follow directly |
| Dark red, moderate | Lower Lung/Liver | 150-400 yards | Very Good | Track steadily, don’t rush |
| Dark, watery, sparse | Paunch/Gut | 300-800 yards | Possible | Track slowly, give time to bleed |
| No blood, hair only | Possible Miss/Graze | Unknown | Poor | Search thoroughly before abandoning |
| Bile stains (yellow) | Intestinal Hit | 400+ yards | Challenging | Extreme patience, wide search grid |
| Sprayed on foliage | Arterial Hit | 50-100 yards | Excellent | Confident track, likely nearby |
🎒 Essential Gear for Successful Deer Tracking
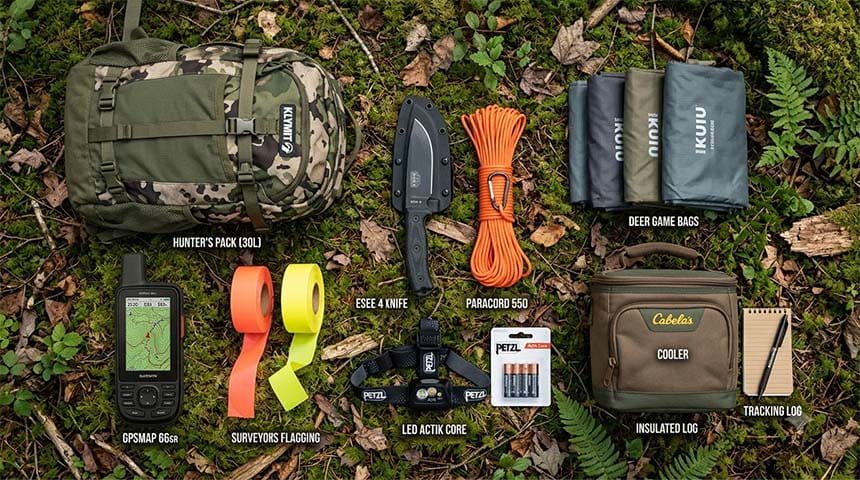
Surveyor’s Flagging Tape
Bright orange or yellow tape, 50-100 foot roll. Mark your trail every 20-30 feet to prevent losing the track. Budget-friendly, essential, and often the difference between recovery and a lost deer.
Sharp Fixed-Blade Knife
A quality hunting knife with a 4-5 inch blade for field dressing. Keep it razor-sharp before the hunt — dull knives make processing difficult and compromise meat quality. Include a bone saw for larger bones.
Quality Game Bags or Coolers
Game bags allow air circulation and keep meat cool. For longer drags, insulated coolers with ice preserve meat quality. Invest in these before you need them — they’re non-negotiable for meat preservation.
Paracord or Rope
50-100 feet of quality rope for dragging. A proper drag harness (DIY or commercial) is far easier than trying to grip legs or antlers. Invest in a drag strap designed for deer — it transforms recovery.
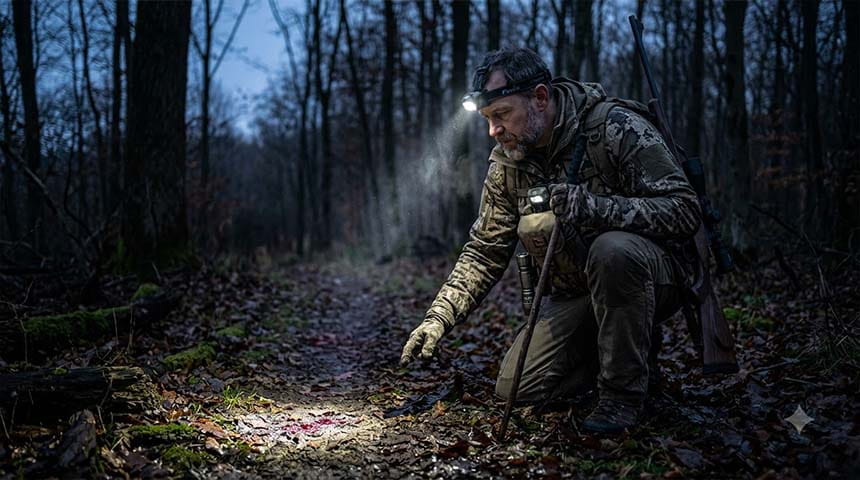
Headlamp or Flashlight
Late-season hunting and extended tracks often lead into darkness. A quality headlamp (hands-free) and backup flashlight are critical. Include extra batteries — running out of light forces an abandoned track.
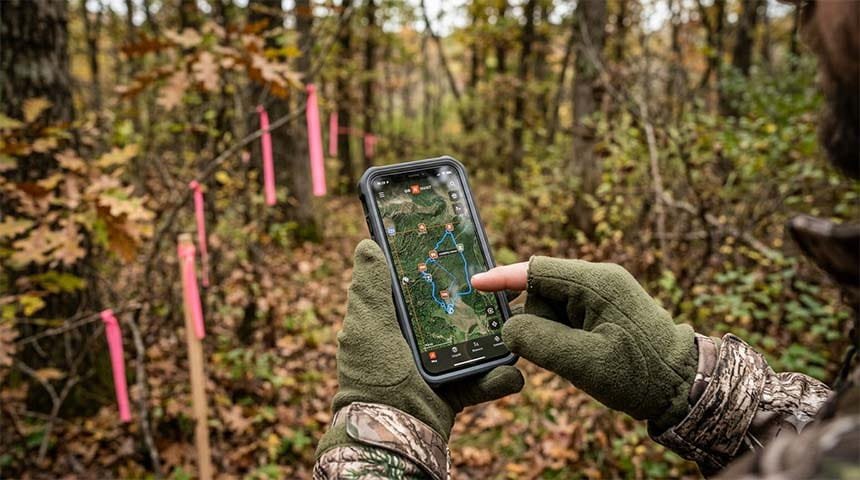
GPS or Smartphone Mapping App
Mark your starting point and waypoints during the track. This prevents getting lost and helps orient large properties. Apps like OnX or Gaia GPS provide detailed land boundaries and terrain.
Backup Firearm/Shooting Method
Carry a handgun or have a follow-up rifle available. A wounded deer requires a humane finishing shot. Be prepared to deliver this with confidence — never leave an animal to suffer.
❓ Frequently Asked Questions on Deer Tracking
1. How long should I wait after shooting a deer with my bow?
Always wait a minimum of 30 minutes, even on confident shots. Broadheads can deflect, fail to penetrate fully, or create smaller wounds than expected. Waiting allows the deer to lie down and bleed out internally. Many experienced bowhunters wait 45-60 minutes on any hit that wasn’t verified as immediately fatal.
2. What if there’s no blood at the shot site?
This doesn’t necessarily mean a miss. Many solid hits produce no immediate blood sign — hair only, or hair without visible wounds. Mark your position, search the area thoroughly for 50-100 yards in the direction the deer traveled. Look for disturbed vegetation, tracks, and listen for crashes. If you find nothing within a thorough search, it was likely a clean miss.
3. How far can a wounded deer travel?
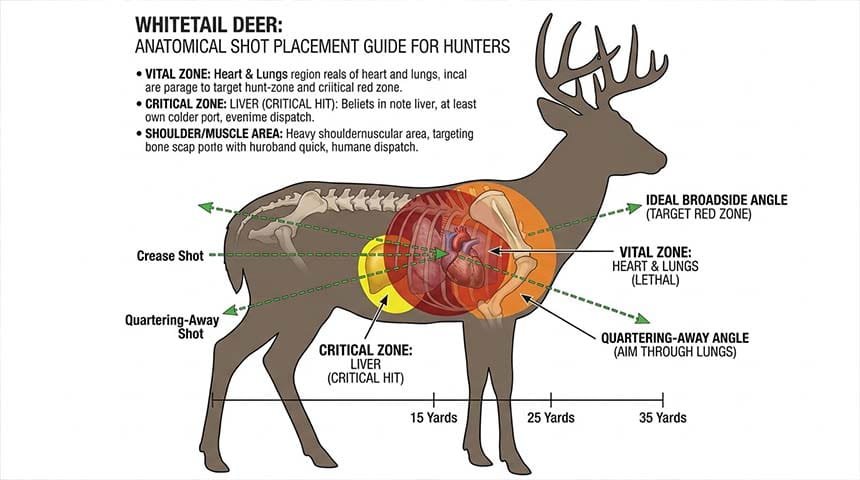
Distance depends entirely on hit location. Heart/lung shots: 50-150 yards. Liver hits: 150-400 yards. Paunch hits: 300-800+ yards. Shoulder/spine shots: 0-50 yards or instantly fatal. This is why shot placement and patience matter more than tracking distance — a poor hit creates a long, difficult track that may fail.
4. Should I bring a friend to help track?
Yes, when possible. Two trackers are better than one for several reasons: one can keep eyes on blood while the other maintains orientation; if a track goes cold, two minds solve it faster; and recovering a heavy deer requires help. However, if alone, go slower, be more methodical, and don’t take unnecessary risks.
5. What if I lose the blood trail completely?
Don’t panic. Mark your last blood spot with a flag, then search methodically using secondary sign: tracks, disturbed leaves, broken branches, and hair. Many deer bed down 100-200 yards from where blood sign ends. Search in likely cover (thick brush, tall grass). Make widening circles and move slowly — you’re likely closer than you think.
6. Is it legal to track a deer at night?
Check your local regulations. Many states allow blood trailing at night with specific methods (headlamp, GPS apps). Some require completing the track before dark or obtaining a special permit. Never assume — know your state’s rules before you hunt. Prepare with a quality headlamp and backup lighting regardless.
7. What do I do if I can’t find the deer after a long track?
If you’ve tracked thoroughly without success and blood sign has truly disappeared, you must abandon the search. Document the attempt, mark the location on a map, and consider returning the next day if regulations permit. Some states require marking the area with flagging. Always prioritize ethical recovery, but sometimes despite best efforts, a wounded deer is lost. Learn from the experience and improve your shot placement next hunt.
8. How do I know if a hit deer is already dead when I find it?
Approach cautiously from the side. Look for rib movement (breathing), eye cloudiness (dead eyes look dull, not glossy), and response to stimuli. Tap near the eye or gently tap the leg — a dead deer won’t react. Only when completely certain it’s dead should you approach closely. If unsure, treat it as alive and have your firearm ready.
💡 Advanced Tracking Tips for Difficult Situations
Rain & Weather Challenges
Rain washes away blood sign within 20-30 minutes. If rain threatens, track immediately after waiting. Heavy rain can make a fresh track nearly impossible — focus on secondary sign (tracks, disturbance). Snow is your friend in tracking; blood stands out dramatically against white backgrounds and prints show clear direction.
Thermal Imaging & Technology
Modern thermal cameras can detect a fresh carcass from distance, especially at night. Some serious hunters use thermal imaging as a last resort for cold trails. Cost is high, but for large property tracking or extended nighttime searches, thermal imaging can mean the difference between recovery and loss.
Tracking Dogs
Several regions offer professional tracking dogs — trained to follow blood trails long after human eyes lose sign. If regulations permit and your budget allows, hiring a tracking dog for a lost trail can dramatically improve recovery odds. Scout these services before hunting season.
Large Property Navigation
On large properties (500+ acres), GPS and mapping become critical. Mark your starting position, waypoints every 100 yards, and reference natural features (ridge lines, water sources). Without good navigation, you can easily end up miles from where you started.
Improving Shot Placement Through Practice
The best tracking strategy is a flawless shot. Spend time before season at the range with your actual hunting firearm or bow. Practice from field positions, at hunting distances, and in low-light conditions. A confident, ethical shot placement prevents the majority of difficult tracking scenarios. Combine this with strategic deer feeder placement to increase encounter opportunities and practice your aim on consistent patterns.
🦌 Final Thoughts: Respect the Animal, Master the Craft
Deer tracking is one of the most rewarding yet humbling skills a hunter can develop. A clean shot followed by methodical, patient tracking builds confidence and delivers high recovery rates. The alternative — a rushed approach or poor understanding of blood sign — results in lost animals and wasted opportunities.
Before your next hunt, review this guide’s key phases: wait patiently, inspect your shot site carefully, flag as you track, read blood sign accurately, and approach with safety and respect. Include tracking essentials in your deer hunting gear checklist. Practice your shot placement relentlessly during the offseason.
Every animal you harvest deserves maximum effort toward recovery. Master these tracking principles, and you’ll transform from a hopeful hunter into a confident tracker capable of recovering even challenging hits. The woods reward patience, preparation, and respect for the pursuit.
⚠️ Legal & Ethical Disclaimer: Hunting regulations vary by state and region. Always verify your local laws regarding shot placement, field dressing location, tracking permissions, and nighttime trailing. This guide represents general best practices but does not override local regulations. Hunt ethically, prioritize animal welfare, and commit fully to recovery of every animal you shoot. Respect the harvest, respect the woods, and pass this knowledge to future hunters.

Leave a Reply